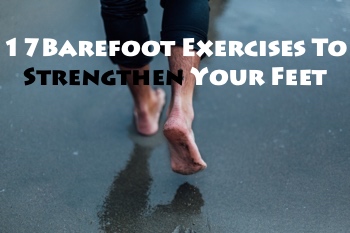
Barefoot Exercises To Strengthen Your Feet
Table of Contents
Now that you have made the amazing choice to work, live, train and move barefoot you will need to get ready. First things first, one of the elementary things you will need to do is to strengthen your feet. This article will walk you through all the exercises and drills you will need to do to strengthen your feet and ankles.
17 Barefoot exercises to strengthen your feet:
- Pencil lifting
- Marble pickup
- Spread the toes
- Ball arch rolls
- Plantar and Dorsiflexion
- Single Leg Calf Raises
- Agility Dots
- Shin Curls
- Toe Walks
- Heel Walks
- Foot Rolls
- Side Shuffles
- Single Leg Balances
- Toe Yoga
- Toe Spread
- Forefoot press
- Toe lifting
When it comes to training, most people overlook two of the most critical parts of their body – their feet. They train the upper body, lower body, and core giving no thought to strengthening their feet.
Barefoot drills and exercises that strengthen the feet, increase ankle flexibility and improve gait patterns are more important than ever before. Professional runners use these drills and skills to embed their gait pattern. The elderly need them, so they are better equipped to prevent falls. Across all ages, they can be used to rehab knee and hip complex issues.
Developing strong ankles and feet is key in moving over to barefoot training free of injury.
These exercises will help build and maintain strength throughout your foot and ankle and lower your chances of injury.
We will ‘step you through’ (pun intended) all the elements required to enjoy the journey to barefoot training in whatever form you choose.
Ideally, you should do these exercises without shoes on or whilst wearing minimalist footwear.
Before You Begin Training Your Feet
Test your feet strength. Use foam rollers and lacrosse balls (Golf ball, hockey ball will work too of various densities and diameters) to loosen up your feet. The softer the foam rollers or balls density and larger the diameter, the easier it will be on your feet. To begin, don’t apply your full body weight to a ball.
Using a foam roller can be a bit painful and uncomfortable when you do it for the first time. Stick it out as best you can…it does get a lot better as you do it more often.
Once you find a “sticky point” (Usually a spot that has what I describe as a knot), stop moving and hold position there gently for a few seconds till the pain eases off, then move on to the next section of your foot.
I generally recommend a count to 15- 30 seconds. This will help smooth out the knots in the muscle tissue.
As a start It’s always a good idea to begin seated, standing only as you get used to rolling and any discomfort. Remember to always carefully test how much pressure you can handle before applying more to the spot you are working on.
The more weight you can apply on your feet while standing (on a lacrosse ball for example) the better shape and the stronger your feet are.
Remember that strengthening your feet is a long-term process if you are new to this.
A little goes a long way, and you must slowly build up with constant effort and daily application.
The following guidelines are for information purposes only. We recommend seeking professional advice before beginning rehabilitation
17 Exercises to Strengthen Your Feet
1.Pencil lifting: Pick up a pencil in the toes. Hold for and count to 5, repeat five times. Aim to perform this exercise 3 times a day. An alternative version of this is to scrunch up a towel in the toes repeatedly.
2.Marble pickup: To restore toes to their full function of gripping, lifting and pushing, and to counteract the tendency of toes to curl. Grab a marble and put it in a cup on the floor. Then grab more marbles and drop them into a cup again.
3.Spread the toes: To enhance the toes’ ability to keep you in balance while moving. Practice raising only the big toe and the pinkie toe, then place feet flat on the floor. Spread the toes as far as they will go and then return them together. Repeat this ten times, rest and the perform a further two sets of 10 repetitions.
4.Ball arch rolls: As I described earlier this helps by massaging and strengthening a weakened arch. Move a ball back and forth under the arch.
Roll Out Your Three Arches: Its uncommon knowledge that there are three arches in the foot.
- The lateral (outside),
- The Transverse (centre)
- Medial (inside)
These all work together to enable you to spring load your feet, which increases strength, balance, and power when they all work together. It is essential you roll your arches out correctly – in the correct order.
- Lateral (outside) arch – This connects directly to your calcaneus (your heel bone) and is your body’s first-floor foundation.
- Transverse (centre) arch – Located just behind the ball of your foot, do this second and approach most gently. Emphasize rolling from the ball of your foot to your heel (rather than heel to the ball). This takes slack out of the fascia rather than increasing it. You can certainly roll it both ways, but make sure to emphasise the ball-to-heel direction with more pressure than the other direction.
- Medial (inside) arch – This does not directly connect to your heel and effectively rests atop your lateral arch. Do this third.
5.Plantar and Dorsiflexion: this is essential for pointing your toes and then pulling them all back to you. Its perfect to loosen and strengthen stiff ankles. You can use a band to Loop a stretch band over the foot while sitting with an extended leg. Push the foot down so that the toes stretch toward the floor, then raise the toes toward your body by pulling the band.
6.Single Leg Calf Raises: While standing with the ball of your feet on a curb or step or some other raised surface. If it is too difficult to do on just one leg, then start out using both feet until your balance increases. Stand close to a wall or railing for support. Double and Single-leg heel drops and raises can then be done for reps, for example, four repetitions five times or (4 X 5) then increase as required.
7.Agility Dots: Hop with both feet (or on a single leg, to make the exercise harder) in an “x “pattern on the floor with the corners of the “x” about one foot apart. Move quickly in an hourglass pattern around the “x” in one direction, then switch directions and repeat the motion. One revolution around is one repetition. Start with 4 in each direction (and on each leg if doing single leg) and increase from there.
8.Shin Curls: Using a step or other elevated surface, stand with toes hanging off the edge as much as is comfortable, then curl your toes and foot up as high as you can without rocking backwards. Stand close to a wall or railing for support. Start with 4 X 5 repetitions and increase from there.
9.Toe Walks: Simply walk about on tiptoe. Do not wear shoes for this do the exercise barefoot. Balance on your toes as high as you can and walk forward and backwards for a set amount of time in each direction. Start with counting to 30 or 30 steps (30 seconds) in each direction and increase your distance as you get better from there.
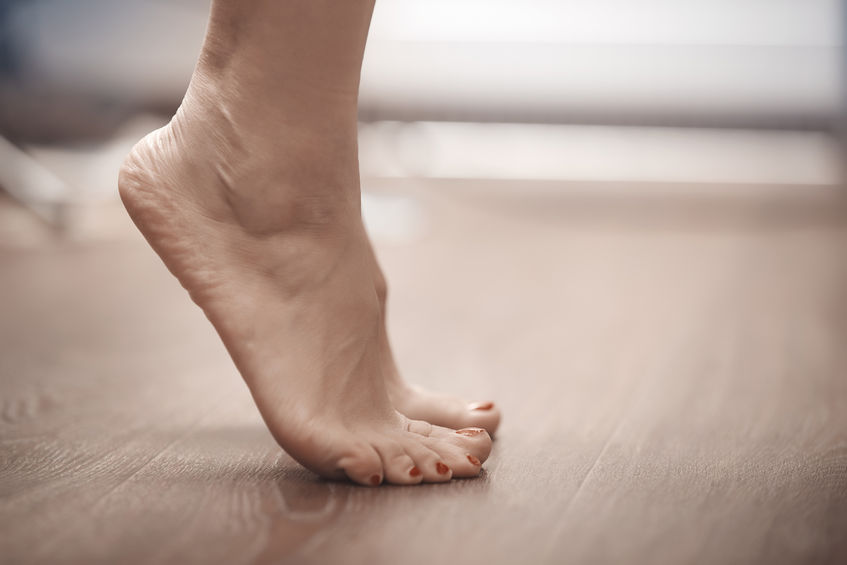
Barefoot Toe walk
10.Heel Walks: As before but walk on your heels as high as you can and walk forward and backwards, Start with counting to 30 or 30 steps (30 seconds) in each direction and increase your distance as you get better from there.
11.Foot Rolls: Set both of your feet onto the outside edge, as far as is comfortable, then rock them back into the inside as much as you can (the rock towards the inside will feel like a very limited range of motion). In and out is one repetition, start with 6 and increase from there.
12.Side Shuffles: Keeping on your toes, quickly sidestep to the left for 4-5 steps, then move back to the right to the starting position. Out and back is one repetition. Start with four reps of the exercise and increase from there. This is similar to the drill we see pro footballer do during training.
13.Single Leg Balances: Balancing on one leg, hold your balance for a set time (count to 30 or more), then switch legs and repeat the motion. You can use a cushion or Bosu ball to increase the difficulty
14.Toe Yoga: With the feet flat on the floor, press the toes downwards into the floor. Do not allow them to curl, or the ankle to move while performing the exercise. Hold for the count of 5, repeat five times. Increase the difficulty of the exercise by holding the contraction for longer.
15.Toe Spread: Place feet flat on the floor. Spread the toes as far as they will go and then return them together. Repeat this ten times, rest and the perform a further two sets of 10 repetitions.
16.Forefoot press: Place the back half of a foot on a suitable book, and the forefoot on a set of weighing scales, ensuring the foot is horizontal as far as possible. Press down with the forefoot onto the scales to see who much force you generate. Repeat 10 times for each foot.
17.Toe lifting: Place feet flat on the floor and try to lift each toe up in turn. Aim to keep the others flat on the floor – this can be tricky. Perform three sets of each toe.
Exercise volumes (Reps and Sets)
As a rule, I recommend the following volumes:
- 4/5 sets of each exercise.
- Max Reps for each set if you can.
- Aim to increase your max rep count for each set as you get better.
- Ensure you aim to keep good form and range of motion.
Remember: If you feel pain stop and only do what you can. The ideal amount of pressure can be defined as “good pain.” It must feel a bit uncomfortable to promote positive change, but the key is applying just the right amount that you can handle without bracing, retracting, defending against the pressure.
“Each foot is made up of 33 joints, 26 bones and more than 100 muscles, tendons and ligaments, and it is loaded inside and out with sensors. Researchers at the University of British Columbia made a huge discovery in 2002: 104 unique, ultra-speedy “mechanoreceptors” on the sole. They measure pressure and indention, which together tell you how to balance”.
Remember the foot is an amazing and key part of our body. With these exercises and drills, this will help in your general well-being and in getting you ready for your barefoot training journey and will be part of your toolkit to ensure your feet’s strength and health. If you enjoyed this post, please share and comment.
Now that you have got this far have a look at my other post for barefoot running beginners here if you would like to run or you can check out my article about barefoot walking article here.
Related Questions
How do you strengthen your feet? Do simple drills to strengthen the different parts of your foot. My top picks are Pencil lifting, Marble pickups, Toes Spreads, Lacrosse Ball Arch Rolls, Plantar and Dorsiflexion, Single Leg Calf Raises. Work each foot daily at first, then 3 times a week. Finally, small runs to enjoy the benefits.